Today, I’d like to cover a few IMPORTANT details about HOW a fully operational boondocking (dry camping) setup is designed. The approach I illustrate has worked quite well for me AND is very cost effective for the budget oriented.
Lets start with WHY I RV Dry Camp (Boondock) …
Freedom and Independence. Freedom to camp (legally) where I choose to. Enjoying the Freedom to NOT have a neighbor 36 inches from my slideouts! Saving on campsite fees, thus creating financial freedom! And… INDEPENDENCE to survive (and thrive) largely on my own without reliance upon the power grid.
Side Benefits of RV Dry Camping (Boondocking)…
Having a “million dollar view” at spectacular locations in serene, pristene and SAFE settings.
With those initial thoughts, lets dive into the “nuts and bolts” of RV Dry Camping
Solar Panels – two “flavors” – ROOFTOP or PORTABLE
Rooftop solar is secure, but park under a tree with leaves and you just rendered your solar setup virtually useless! Portable *can* be stolen, I try to mitigate the risk based upon where I choose to dry camp (boondock.) It is the ability of using portable solar to get it into the sun, I prefer (greatly) portable over rooftop.
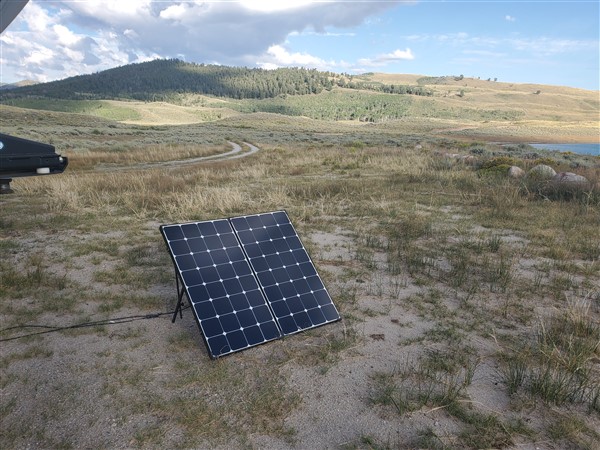
My clear and unambiguous choice in Portable Solar Panels
Renogy Solar Suitcase – Renogy makes a quality product, it is priced competitively. Their tech support is SUPERB, and customer service is EXCELLENT. ‘Nuf said? Point of information: My links are affiliate links. They cost you nothing more to use them and help me to defray website related costs. Thank you for your support!
Connecting your Renogy Solar Suitcase to your camper
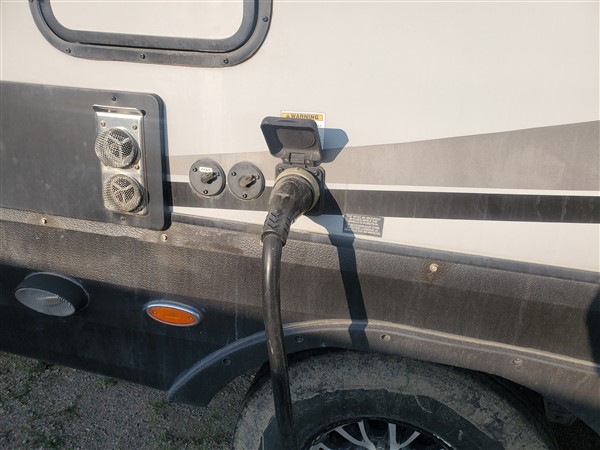
Let’s start here: AVOID the port on the side of your camper that says its for connecting solar power! That port is a SCAM!! That port is there because a 2nd rate company called Zamp who PAYS all the RV manufacturers to install THEIR port onto the side of what will become YOUR camper. Zamps panels are EXPENSIVE and NOT well regarded.
For direct current systems, it’s important to use HEAVY GUAGE wire to connect the panels to the batteries. The Renogy system provides appropriate guage wiring to provide for minimal energy loss between your panels and the batteries. The wiring behind the camper wall from the Zamp ports is a “black box.” Since you have no idea what type or length of wiring was used behind the Zamp port, its best to connect DIRECTLY to the batteries.
The WISE solution…
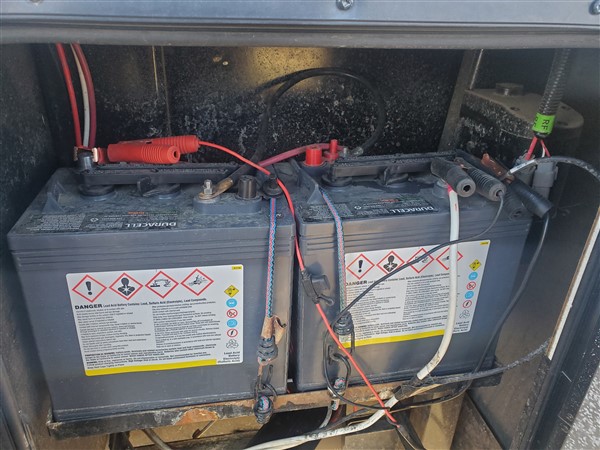
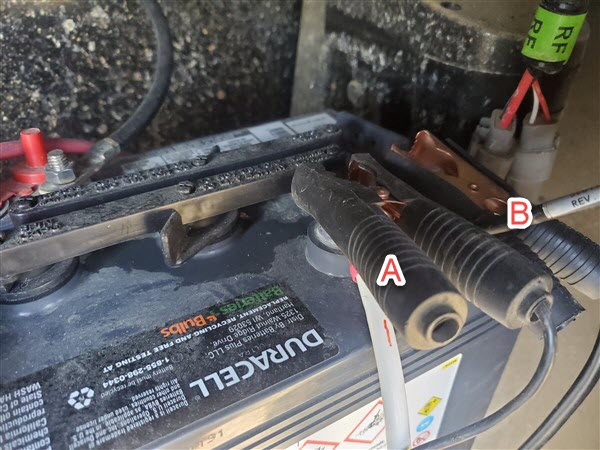
Connect the Renogy Solar Suitcase DIRECTLY to the batteries using the (supplied) alligator clips. They clip directly to the + and – battery terminals. The Renogy Solar Suitcase comes with 10 ft. of cable. You can order extra lengths. In order to avoid creating too much energy loss, keep the extra cable to a minimum! In my case, I ordered an additional 10 ft. of cable. This gives me 20 ft. total. It enables me to get the solar panels into the sun and away from any trees or my camper.
What do my solar panels do and what can I run in my camper?
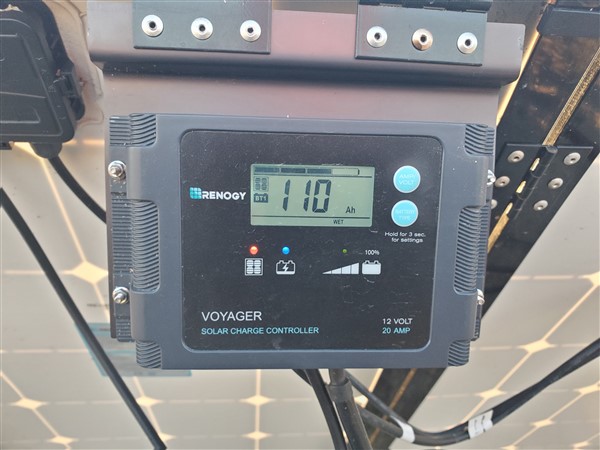
Your solar panels collect solar energy. They then send energy to your batteries in the form of 12 volt DC. Your batteries then store that energy. The amount they can store is measured in “amp-hours.” In my case, mine can store 235 amp-hours, half of which is available to me due to the batteries design. See my post about RV batteries HERE to learn more on that topic.
Your camper has two types of power hungry equipment in it. Things that run on 12v DC and things that run on 120v AC. Among the AC (alternating current) appliances, you have those that demand very little wattage (low wattage appliances) and those that demand LOTS of power (high wattage.) Let’s take a look at each:
12 volt direct current equipment:
- Lights
- Furnace
- Hot water heater (also has a 120v AC switch)
- TV (sometimes)
- Radio
- Fridge (gas absorption type or 12v DC compressor type)
120 volt AC (alternating current) LOW wattage
- Laptop
- TV (most of the time)
- electric toothbrush, water pik, sinus cleanse
- phone brick for charging the phone
- residential fridge (borderline)
- Aero-Gardens
120 volt AC High wattage
- Air Conditioner
- Microwave
- Coffee Pot/Hot water heater or anything with a heating element
The way I boondock, I write off the high wattage 120v AC appliances! To run those, you must invest FAR more than the $1000. or so that I have done to date. At this point, short of getting a new inverter, I have no plans to throw more money into dry camping!
Converters and Inverters
Virtually all RV campers (trailers and motorhomes) come with a Converter. The converter is a device that converts 120v AC to 12v DC when connected to shore power. It’s job is to keep your batteries charged.
If and when it fails, you often discover the failure by noting your batteries went dead! Travelers who spend most of their time connected to shore power, rely upon the converter to charge their RV batteries. Generators also power the converter to charge the batteries. If you have a motorhome, these are often referred to as the house batteries. When dry camping (boondocking), you need solar panels to charge the batteries as the converter is inactive.
RV Inverters 101
Now let’s talk INVERTERS. The inverter takes 12v DC (supplied by the batteries) and converts it to 120v AC. Thus you are using your 12v DC battery system to power 120 v AC equipment (LOW wattage equipment!!)
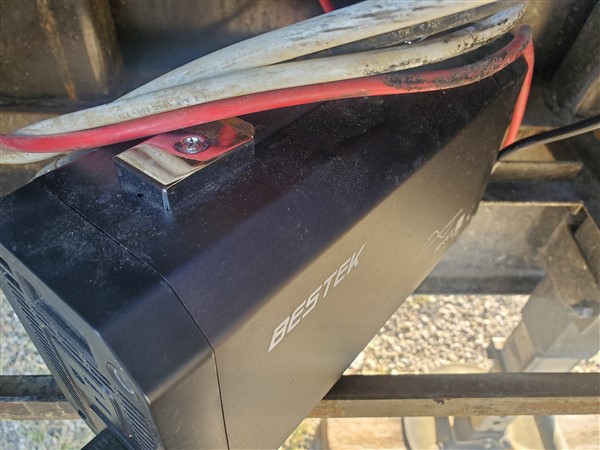
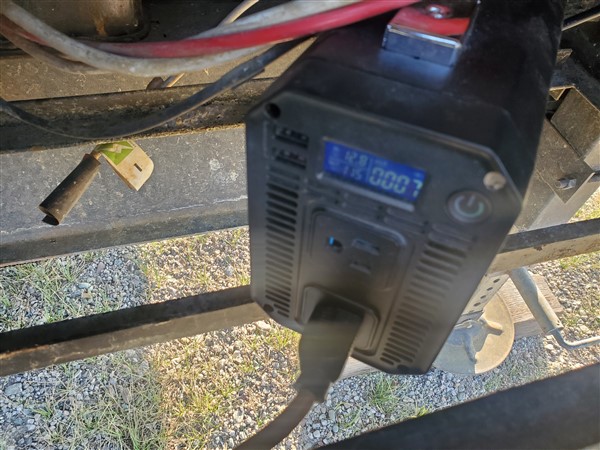
Currently, I use a 1000 watt Bestek to power my laptop, toothbrush, phone charger and other LOW wattage AC equipment. I discuss this in greater detail in my previous post.
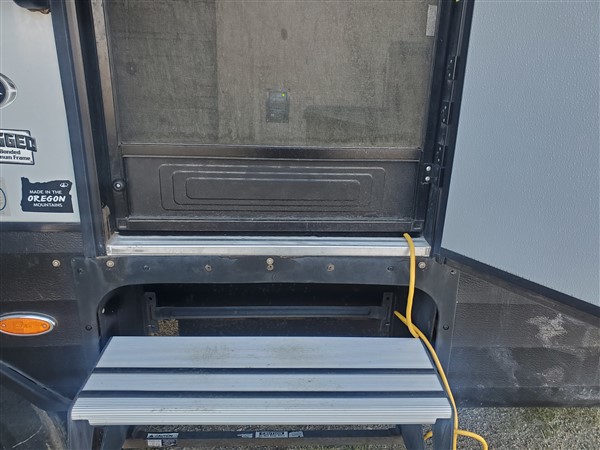
Here’s how it works: I connect the inverter directly to the batteries (see photos.) I then plug an extension cord into the inverter and run it into my camper. Thus the inverter serves whatever I need to plug in at the time (within limits!!)
An Inverter for your RV is NOT an unlimited source of power!
Limits include what you can operate and whether you can connect it to the main power connection for your camper. (I explain why in my prior post.) Had the Renogy 2000 watt inverter been available when I purchased my Bestek, I would have opted for the Renogy. It (the Renogy) is now at a very competitive price and WHEN I buy one WILL serve ALL my needs. This includes plugging the inverter directly into the the camper, which will then make ALL outlets live in my camper.
Remember it is the batteries that store energy and supply power to the camper. Even with a 2000 watt Renogy inverter, you DO have to think about what you are trying to operate. Ultimately the batteries that are powering that equipment. This is why I don’t even entertain the idea of operating high wattage AC equipment without the use of a powerful generator.
A Special Note for those with a Residential fridge
You already do have an inverter, typically a 1000 watt inverter. Important: This inverter is wired directly into the camper for the SOLE purpose of powering the residential fridge. It will not readily lend itself to powering anything else when boondocking. Bottom line: you will need an additional inverter to run the rest of your “stuff.”
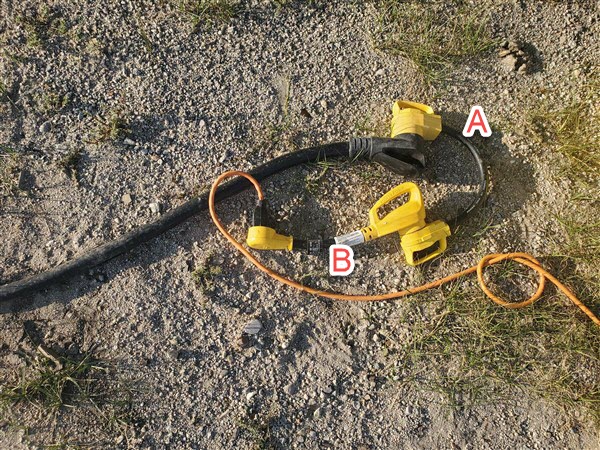
HOW to connect your inverter to your camper directly
See the photos in this post below and know that the connectors you need are HERE. Essentially, you need from your camper a 50A (if its a 50A wired camper) to a 30A adapter. Virtually all rv’ers will need a 30A to a 15A (household current) adapter. Finally, an extension cord to plug into the inverter. My video illustrates and narrates all this!
Again, when you use this approach, all outlets will go live in the camper. Note: you must respect your power source (your batteries) and know that they are limited in what they can do. You certainly CAN go for more and/or more powerful batteries than I have. What it comes down to is a matter of budget. AND… expectations of what you want/need to power, and how often you boondock (dry camp.)
If this information helps, PLEASE let me know in the comments below. Please do give my video a thumbs up IF it deserves it!
Like my content? You can also sign up for my newsletter below. You will be notified the moment I generate new posts about RV’ing, RV life, RV lifestyle, RV health, and more…
Alan,
Don’t plug the inverter directly into the RV’s AC power. Doing so will cause the converter (120VAC -> 12VDC) to try to charge the batteries.
If you’re going to do this, make sure that the converter is somehow shut off.
Ken,
Noted, and I believe I address this in my posts on this topic. This is why my 1000 w Bestek doesn’t like to be connected to the RV’s main power port. I believe the 2000w renogy will have no issues. As to disabling the converter – in my situation, that’s easier said than done! But… good point.
Al
Some thing you might mentioned about running the camper through the inverter. Is that you need to turn off the converter inside. Otherwise it creates a endless loop and will drain the batteries.
VERY helpful Al! I am “starting” to get it! Ha. Thanks!