RV Roof Maintenance
When I’m looking at a camper (trailer OR motorhome) for myself or one of my clients, do you know what my FIRST question is? Yep, its “Any signs of water damage or leaks?”
If the answer is “yes” to water damage (even a little), I’m DONE with that camper. Why? Once water gets into the roof, walls or floor of a camper, MOLD is likely not far behind. And there’s this little thing called “toxic mold” or “black mold”. I’m sure you’re with me that WE don’t want to risk that!!
So, what’s the #1 part of your RV that is subject to leaking AND also happens to be the part that MANY people IGNORE? Yep, it’s your RV’s ROOF.
You see, there are lots of places where water *could* find its way into your camper. So, unless you have a one-piece roof with NOTHING mounted on it, YOU are at risk of leaks IF you don’t maintain your roof.
The GOOD NEWS? It’s not difficult to maintain your roof with periodic checks and maintenance as needed.
Before I get into specifics – what you need and how to apply it, I’d like to introduce you to a video from The Depreys that discusses RV roofs and emphasizes the point…
RV Roof Maintenance – What do you need?
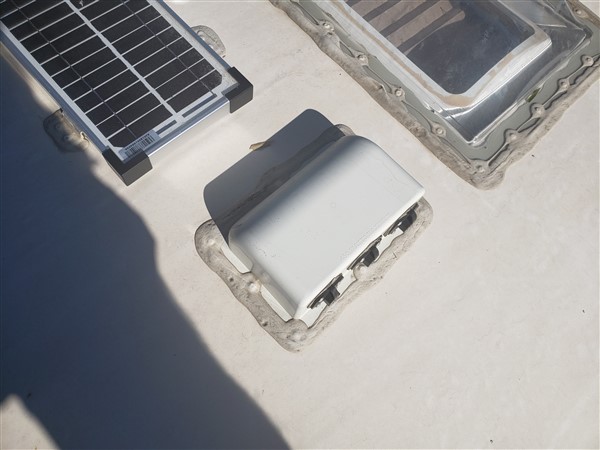
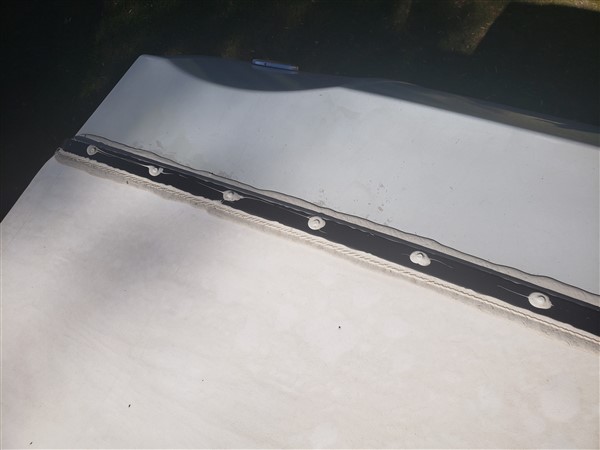
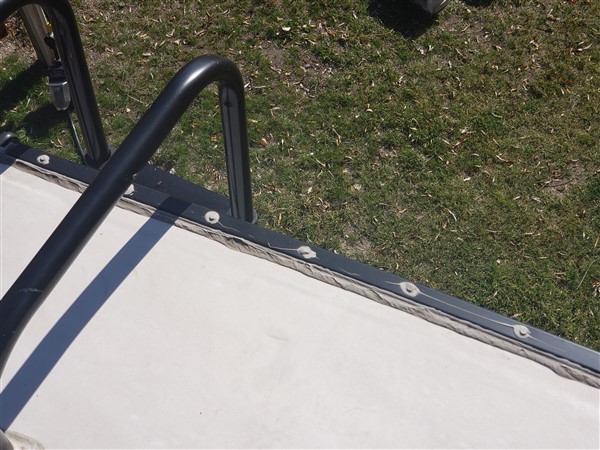
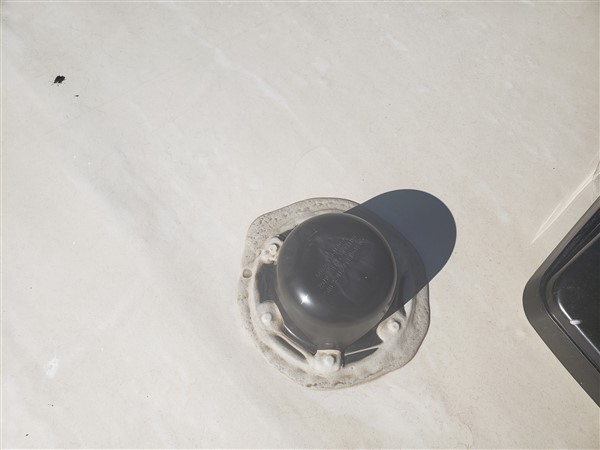
Look at the photos of my roof and the captions. You’ll see “caulk-like” material called “dicor” where the front cap meets the EPDM (rubber) roof, also where any roof feature is mounted (vents, a/c, antenna, etc.) Dicor is what you’ll need, because THAT is where you’re vulnerable! If the dicor cracks or wears, water can (and likely will) find its way into your camper – and THAT is truly bad news.
Dicor for RV Roof Maintenance comes in “two flavors”
Self-leveling dicor and non-leveling dicor – you’ll need both. Self leveling is for HORIZONTAL surfaces; non-leveling is for VERTICAL surfaces. You can order them below – I’ve searched to find the best price. They are also available in multiple packs for larger jobs. I recommend starting with a couple of tubes of self leveling and one non-leveling unless you know you’re facing a big job.
Self Leveling Dicor
Non-Leveling Dicor
Tips on how to apply Dicor to your roof…
I’m not an expert handyman by ANY means (my friends are inevitably laughing at that statement!) – but – what I CAN do is research and absorb info. So… when it comes to advising you, I’m going to turn to a few experts who can offer advice. These comments are taken from user reviews on Amazon.
Tips for Working with Self-Leveling Dicor…RV ROOF MAINTENANCE
This sealant is for use on horizontal surfaces. Do not use it on vertical surfaces or it will run down the sides. There is a negative review on this product complaining that it does not self-level, the negative review is misleading. This product does self-level.
This works great on things like roof vents and where ceiling fans protrude from the roof. It kind of works this way: let’s say you have a screw head you want to cover, put a 1/2″ high glob of 501LSW on it that completely covers the screw head. After a few moments, the glob will spread out to a larger circle and be about 1/4″ high. If you are using this like traditional caulk and just running a bead of it, that won’t work right. It has to be a tall bead of caulk so that it can level out. Like the example above with the screw head, if you put a bit of caulk on the screw head that is 1/8″ high that won’t spread and it probably won’t self-level much either.
This stuff is meant to be put on in a generous manner, it is not going to look pretty but it will flow into nooks and crannies and fill potential leak spots. If you are near the edge of your roof be careful as this can level out by the roof edge and drip down the sides. In a way it is similar to baking cookies, you put a ball of cookie dough on a sheet and as it bakes the dough ball spreads out and makes a thin cookie. If you think of this product like the cookie I think it will be closer to expectations.
From a 2nd reviewer:
Dicor sealant is hands down the best stuff for sealing campers. It’s best to apply it with a small, flat paintbrush. It will self-level so when you are done it flattens out which looks great, and allows water to flow across it. Dicor is much better than silicone, which will crack, leak, peel, and doesn’t self-level. I put a new vent on my 1984 pop up camper and used this to seal if. You get a lot so I used the rest to seal every seam and crack on the roof. That would have been enough, but I also bought a gallon of UV roof sealer and rolled on three coats to protect the dicor and seal the roof. My old camper didn’t leak at all during three days of torrential downpours. The wind was blowing too, which says a lot. I know this will last a long time so I won’t have to keep reapplying silicone. I recommend buying an extra tube to keep just in case you find yourself needing it in the middle of nowhere.
Tips for working with non-leveling Dicor
Here are 4 brief reviews with tips:
When working with dicor, denatured alcohol is your friend. Make sure you have some because dicor does not come back off of places you do not want it otherwise. Tip 2, painters tape. get some also. allow the dicor to cure for 30 min to skin up a little bit. Pull tape towards dicor line and smooth the gooey edge with that handy alcohol rag you have next to you. Note: The original review called for the use of Acetone – this is not recommended as acetone does not play well with rubber roofs; Also – be aware – alcohol is highly flammable so an alcohol soaked rag must be treated accordingly.
………………………………………………………………………….
I feel confident that my camper will no longer leak. I have worked with a lot of caulk and silicone over the years and am pretty good at smoothing it out… but this stuff skins over quick and is THICK! It’s kind of a pain to smooth out, but once it’s dry, I am confident that the leak is sealed for a LONG time. Great product!
………………………………………………………………………..
This stuff is awesome. I completely rebuilt a Coleman camper roof that was water damaged and used this after all the work was done to seal everything up. Caulked every single seam and then painted the whole thing with kool seal and it’s been great. No problems at all. This is the non-sag stuff, so great for vertical seams. If you want the stuff that sort of runs into cracks on horizontal surfaces, that’s a different product.
………………………………………………………………………….
What an amazing product to use when resealing or touching up the seals vertically on your RV. Stays right where you squeeze it out!
A solution to TEARS in your RV Roof
EPDM and TPO roofs are both subject to tearing or ripping (from a tree branch or whatnot.) When this happens, Eternabond should be your “go to” solution. Eternabond is a tape that once applied, will not come off easily! You can also (and probably should) dicor over it.
If you’re looking for additional accessories for your camper. I have compiled an UPDATED list of “must-haves” that I use myself – click on the image below…

As always, THANKS for visiting! If you want to be sure to be notified of future posts, all you need do is add your first name and email address in the form below.
The life of an RV can be enhanced by keeping the roof clean, debris free and applying a coat of RV Roof Magic. To get the best return on your investment be sure to do regular maintenance. Cleaning the roof bi-annually will help to maintain its durability and longevity.
I see you ARE rv roof magic, I (and my readers) will look into it. I hope to hear from some as to the wisdom of using this product. Al
Great reminder! As stated, even brand new RV’s can have issues and problems…best to catch them ASAP! Maybe a little “wordy” but still very good!
Thanks Bob!